Google Sheets vs. other freelance invoice tools
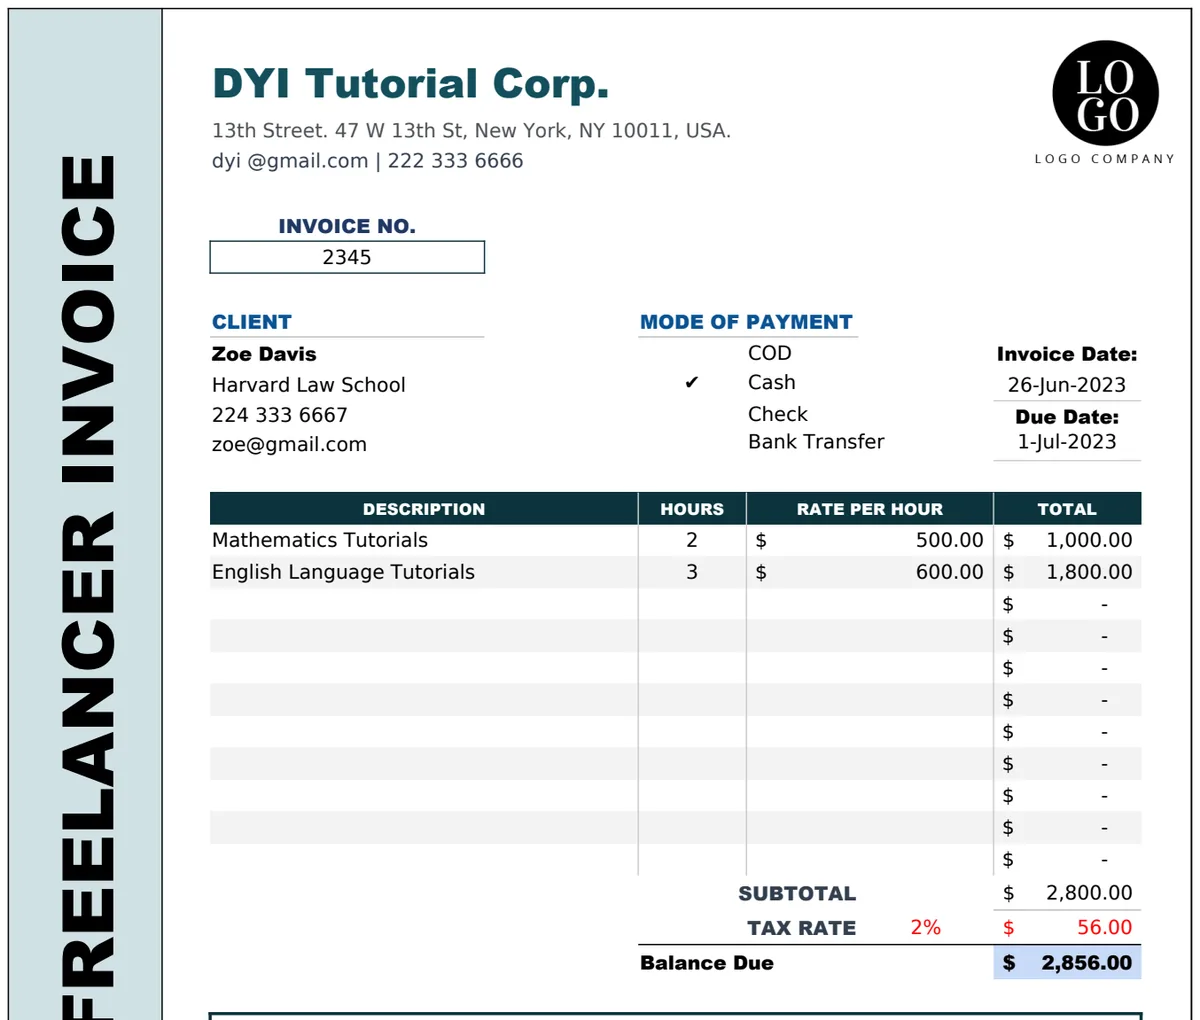
Discover how to transform your Google Sheets freelance invoice template from static to dynamic for maximum efficiency.
The most common mistake when setting up a freelance invoice template in Google Sheets is treating it as a static document rather than a dynamic system. Most people create a single sheet for one invoice, then duplicate it and start from scratch for the next. This is inefficient. A truly effective freelance invoice template Google Sheets solution uses separate sheets for clients, services, and invoice numbers, linking them with formulas to auto-populate details, saving you hours each month.
To build a robust freelance invoice template Google Sheets system that scales with your business, you’ll need a few key components. This approach minimizes manual data entry and reduces errors, ensuring you get paid accurately and on time. We’ll walk through setting up the core sheets and formulas that make this possible.
Setting Up Your Core Data Sheets
Before you can generate an invoice, you need your foundational data organized. We’ll create three essential sheets:
- 01Clients: This sheet will store all your client contact and billing information.
- 02Services/Products: Here, you’ll list the services you offer and their standard rates.
- 03Invoice Register: This acts as your central log for all invoices issued, including dates, client, amount, and payment status.
The "Clients" Sheet
This sheet should have columns like:
- Client ID: A unique identifier for each client (e.g., C001, C002). This is crucial for linking data.
- Client Name: The full name or company name of your client.
- Contact Person: The primary contact at the client’s company.
- Email: Their primary email address for sending invoices.
- Billing Address: The full address to appear on the invoice.
- Payment Terms: Your standard payment terms for this client (e.g., Net 30, Due on Receipt).
- Notes: Any specific client-related information.
The "Services/Products" Sheet
Keep this simple and focused:
- Service ID: A unique identifier for each service (e.g., S001, S002).
- Service Name: A clear description of the service (e.g., "Website Design - Hourly," "Content Writing - Per Article").
- Rate Type: Specify if it’s "Hourly," "Fixed," or "Per Unit."
- Default Rate: The standard price for this service. This can be a dollar amount or an hourly rate.
The "Invoice Register" Sheet
This is your master log, essential for tracking and reporting:
- Invoice Number: A unique, sequential number for each invoice.
- Invoice Date: The date the invoice was generated.
- Client ID: The ID of the client the invoice is for. This is how we’ll link to the "Clients" sheet.
- Total Amount: The final amount due on the invoice.
- Status: "Draft," "Sent," "Paid," "Overdue."
- Due Date: Calculated based on the invoice date and client payment terms.
- Payment Date: The date the invoice was paid.
Designing Your Invoice Template Sheet
Now, let’s create the actual invoice layout. Name this sheet something like "Invoice Template." This sheet will pull data from your core sheets using formulas.
Columns you’ll need on your "Invoice Template" sheet:
- Your Company Information: Name, Address, Contact details. These are static and can be typed directly.
- Invoice Details:
- Invoice Number: This will be a dropdown or a field where you select an existing invoice number from your "Invoice Register."
- Invoice Date: Pulled automatically once an Invoice Number is selected.
- Due Date: Pulled automatically.
- Client Information:
- Client Name: Pulled using the selected Invoice Number and Client ID.
- Client Address: Pulled automatically.
- Client Email: Pulled automatically.
- Payment Terms: Pulled automatically.
- Line Items: This is where you detail the work performed.
- Service ID: A dropdown list of services from your "Services/Products" sheet.
- Description: Auto-populates based on the selected Service ID.
- Quantity/Hours: You enter this manually (e.g., 10 hours, 2 articles).
- Rate: Auto-populates from "Services/Products" based on Service ID.
- Line Total: Calculated as Quantity/Hours \* Rate.
- Summary:
- Subtotal: Sum of all Line Totals.
- Tax (if applicable): Calculated based on a set percentage.
- Total Amount Due: Subtotal + Tax.
Implementing the Formulas for Automation
This is where the magic happens. We’ll use a combination of VLOOKUP, XLOOKUP (if available in your Google Sheets version), SUMIFS, and data validation.
Linking Invoice to Client Data
On your "Invoice Template" sheet, let's say your Invoice Number is in cell B3.
- 01Get Client ID: In a hidden helper column (e.g.,
Z1) on your "Invoice Template" sheet, use a formula to find the Client ID associated with the selected invoice number. Assuming your "Invoice Register" sheet has Invoice Number in column A and Client ID in column C:
``Excel =IFERROR(VLOOKUP(B3, 'Invoice Register'!$A:$C, 3, FALSE), "") ` Or, with XLOOKUP: `Excel =IFERROR(XLOOKUP(B3, 'Invoice Register'!$A:$A, 'Invoice Register'!$C:$C, ""), "") ``
- 02Get Client Details: Now, use the Client ID from
Z1to pull the client's name, address, etc., from your "Clients" sheet. Assuming "Clients" sheet has Client ID in column A, Name in B, Email in D, Address in E:
- Client Name (e.g., in cell B7):
``Excel =IFERROR(XLOOKUP(Z1, 'Clients'!$A:$A, 'Clients'!$B:$B, ""), "") ``
- Client Email (e.g., in cell B8):
``Excel =IFERROR(XLOOKUP(Z1, 'Clients'!$A:$A, 'Clients'!$D:$D, ""), "") ``
- Client Address (e.g., in cell B9):
``Excel =IFERROR(XLOOKUP(Z1, 'Clients'!$A:$A, 'Clients'!$E:$E, ""), "") ``
Populating Line Items
This is often the most complex part. Let’s assume your line items start in row 15, with Service ID in column A, Description in B, Quantity in C, Rate in D, and Line Total in E.
- 01Service Description (e.g., in cell B16, for the first line item):
``Excel =IFERROR(XLOOKUP(A16, 'Services/Products'!$A:$A, 'Services/Products'!$B:$B, ""), "") ``
- 02Rate (e.g., in cell D16):
``Excel =IFERROR(XLOOKUP(A16, 'Services/Products'!$A:$A, 'Services/Products'!$D:$D, ""), "") ``
- 03Line Total (e.g., in cell E16):
``Excel =IF(AND(C16<>"", D16<>""), C16*D16, "") `` Drag this formula down for all your potential line item rows.
Calculating Totals
- 01Subtotal (e.g., in cell E30): This sums up all the Line Totals.
``Excel =SUM(E16:E29) ` (Adjust the range E16:E29` to cover all your line item rows).
- 02Tax (e.g., in cell E31): If you charge a flat tax rate (say, 7% from cell
B32on your template):
``Excel =IF(E30>0, E30*B32, "") ``
- 03Total Amount Due (e.g., in cell E33):
``Excel =E30+E31 ``
Automating Invoice Number Generation and Status Updates
A critical part of a good freelance invoice template Google Sheets setup is managing invoice numbers and statuses.
Generating New Invoice Numbers
You need a system to assign unique, sequential invoice numbers.
- 01Maintain a Sequence: On your "Invoice Register" sheet, in the "Invoice Number" column (Column A), you can use a formula to generate the next number. If your last invoice number was
INV-2026-050, the next should beINV-2026-051.
A formula for cell A2 (assuming A1 is a header) might look like: ``Excel ="INV-"&YEAR(TODAY())&"-"&TEXT(MAX('Invoice Register'!$A:$A)+1, "000") `` Caveat: This formula assumes your invoice numbers are purely numeric and sequential after the prefix. For more complex formats or if you manually enter invoice numbers, you’ll need a more sophisticated approach, possibly involving a separate sheet to track the next number.
- 02Dropdown for Invoice Selection: On your "Invoice Template" sheet, for the Invoice Number cell (e.g.,
B3), set up Data Validation to create a dropdown list of all Invoice Numbers from your "Invoice Register" sheet. This ensures you’re always working with a valid, existing invoice number.
Updating Invoice Status
When you mark an invoice as "Paid" on your "Invoice Register" sheet, you might want to automatically update the "Payment Date."
- On the "Invoice Register" sheet, in the "Payment Date" column (e.g., Column G), if the "Status" (Column E) is "Paid":
``Excel =IF(E2="Paid", IF(G2="", TODAY(), G2), "") ` This formula will put today’s date in G2` if the status is "Paid" and the payment date is currently blank. If a payment date already exists, it keeps it.
Enhancing Your Invoice Template
To make your freelance invoice template Google Sheets solution even better:
- Client Dropdown: On the "Invoice Register" sheet, for the "Client ID" column, use Data Validation to create a dropdown list pulling from your "Clients" sheet's Client IDs. This prevents typos.
- Service Dropdown: Similarly, on the "Invoice Template" sheet's line item section, use Data Validation for the "Service ID" column, pulling from your "Services/Products" sheet.
- Conditional Formatting: Use conditional formatting on the "Invoice Register" to highlight overdue invoices (e.g., if
Statusis "Sent" andDue Dateis in the past). - Logo: Add your company logo at the top of the "Invoice Template" sheet.
- Notes/Terms: Include a dedicated section for specific project notes or general payment terms.
Common Mistakes to Avoid
- Using a Single Sheet: As mentioned, creating one invoice per sheet and duplicating is inefficient and error-prone. Stick to a system with core data sheets.
- Manual Data Entry: Avoid typing client details or service rates repeatedly. Use lookups and dropdowns.
- Inconsistent Invoice Numbering: Ensure your invoice numbers are sequential and unique. This is vital for record-keeping and audits.
- Not Tracking Payment Status: A clear "Status" column in your "Invoice Register" is essential for managing cash flow.
- No Backup: Always ensure you have a reliable backup of your Google Sheet, especially before making significant formula changes.
Frequently Asked Questions
How do I make a dropdown list for clients and services?
On the sheet where you want the dropdown (e.g., "Invoice Register" for Client ID, or "Invoice Template" for Service ID), select the cell(s). Go to Data > Data validation. Choose "List from a range" and select the range containing your client IDs or service IDs from their respective sheets (e.g., 'Clients'!$A$2:$A$100).
Can I add taxes automatically?
Yes. If you have a consistent tax rate, you can either add a cell for the tax rate on your "Invoice Template" sheet and reference it in a formula, or hardcode it if it never changes. For multiple tax rates or complex scenarios, you might need a more advanced setup or a dedicated template. For a comprehensive solution, consider a dedicated Freelancer Invoice Template.
How do I track payments against specific invoices?
Your "Invoice Register" sheet is the key. Ensure you have columns for Invoice Number, Total Amount, Status, and Payment Date. When a payment comes in, update the Status to "Paid" and enter the Payment Date. You can then use SUMIFS on another sheet or your dashboard to sum up amounts based on status. The Time Log Invoice Tracker can help with tracking billable hours that feed into invoices.
What if I need to create invoices for different types of clients, like authors?
For specialized needs, specific templates can be very helpful. If you're an author billing for writing services, the Author Invoice Template is designed for that purpose, streamlining billing for content creation projects.