Google Sheets travel plan that organizes your trips
Discover how a free Google Sheets travel itinerary template can simplify your trip planning and keep all your details organized.
The TRANSPOSE function in Google Sheets can be incredibly useful for reorienting your itinerary data, turning rows of dates into columns for a more visual, day-by-day layout. If you're searching for a travel itinerary template Google Sheets free, you're likely looking for a structured way to manage trip details without starting from scratch. A well-designed template can save you hours, ensuring you don't miss crucial information like flight numbers, booking confirmations, or contact details.
Many free templates exist, but their effectiveness varies. Some are overly simplistic, while others are bogged down with unnecessary features. The key is finding one that balances comprehensiveness with ease of use, allowing you to quickly input and access all your travel plans. You can adapt many of these templates to fit specific trip types, from quick weekend getaways to extended international adventures.
Why a Structured Itinerary Matters
A structured travel itinerary isn't just a list of places to visit; it's a central hub for all your travel logistics. It acts as a single source of truth for flights, accommodation, transportation, activities, and emergency contacts. Without this structure, you risk fragmented information scattered across emails, notes, and various booking confirmations, leading to confusion and potential missed connections or bookings. For example, imagine trying to find your hotel check-in code in a rush at the airport; a dedicated field in your itinerary makes this seamless.
Consider the benefits: clarity on daily schedules, easy reference for booking numbers, and a consolidated view of expenses. This organization is especially critical for group travel, where multiple people need access to the same information. A shared Google Sheet itinerary allows everyone to stay updated, reducing the need for constant communication and avoiding discrepancies. This centralizing effect minimizes stress and allows you to focus on enjoying your trip, not managing its minutiae.
Essential Components of a Travel Itinerary Template
A robust travel itinerary template should cover more than just dates and times. Think about the practical details that make a trip run smoothly. At a minimum, you'll want sections for:
- Trip Overview: Destination, travel dates (start and end), purpose of trip (e.g., vacation, business, family visit).
- Transportation:
- Flights: Airline, flight number, departure/arrival airports and times, booking reference, confirmation number, seat assignment.
- Trains/Buses: Operator, route, departure/arrival stations and times, booking reference.
- Rental Cars: Company, pick-up/drop-off locations and times, reservation number, vehicle type.
- Local Transport: Notes on expected methods (e.g., ride-sharing, public transit passes).
- Accommodation:
- Hotel/Rental Name, Address, Phone Number, Check-in/Check-out Dates and Times, Booking Reference, Confirmation Number, Room Number (if known), any special notes (e.g., accessibility needs, breakfast included).
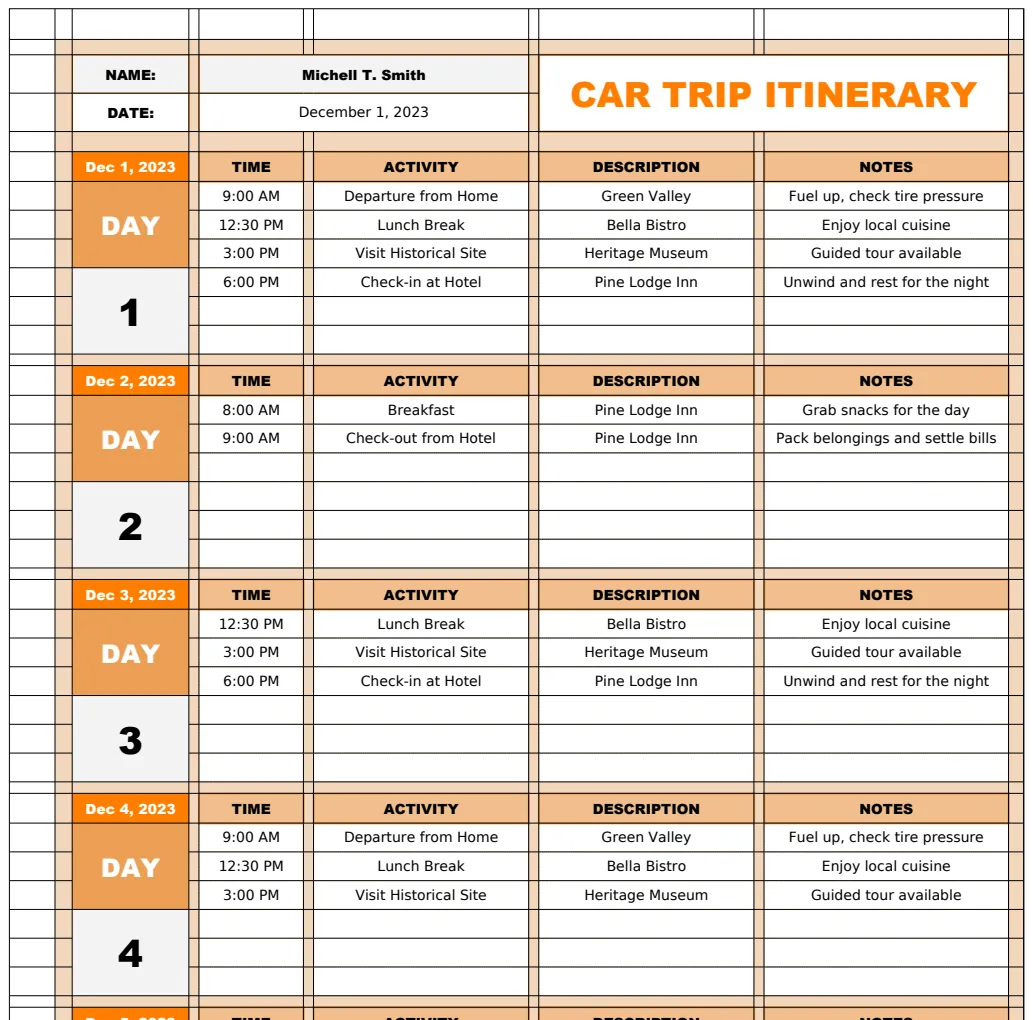
- Daily Schedule: This is the core. For each day, you'll want columns for:
- Date: E.g., "2024-07-15"
- Day of Week: E.g., "Monday"
- Time: E.g., "09:00 AM"
- Activity/Event: E.g., "Visit Eiffel Tower"
- Location: E.g., "Champ de Mars, Paris"
- Notes/Details: E.g., "Booked tickets online, meet guide at entrance," or "Reservation for 2 at 7:30 PM."
- Booking Reference/Confirmation: Crucial for quick lookups.
- Important Contacts: Emergency contacts, local embassy/consulate, travel companions' numbers, hotel front desk.
- Documents & Links: Links to digital tickets, visa information, travel insurance policy, important websites.
- Budget/Expenses: A simple tracker for planned vs. actual spending per category (optional but highly recommended).
Adapting for Different Trip Types
While a template provides a solid foundation, remember that flexibility is key. A weekend city break requires less detail than a three-week backpacking trip across multiple countries. For shorter trips, you might consolidate transportation and accommodation details at the top and focus the daily schedule on key activities. For longer, more complex journeys, consider breaking down the "Daily Schedule" into separate sheets for each week or even each destination to maintain clarity. You could also add columns for "Currency" or "Local Time" for international travel.
Leveraging Google Sheets Features
Google Sheets offers built-in tools that can significantly enhance your itinerary.
- Conditional Formatting: Highlight upcoming events, overdue tasks, or flights with tight layovers. For instance, you could set a rule to turn the background of a row red if the "Arrival Time" is less than 2 hours after the "Departure Time" on a connecting flight.
- Data Validation: Use dropdown lists for common fields like "Transportation Type" (Flight, Train, Car) or "Activity Type" (Sightseeing, Dining, Meeting) to ensure consistency and speed up data entry.
- Hyperlinks: Embed direct links to booking confirmations, Google Maps locations, or relevant websites within your itinerary cells.
- `IMPORTRANGE`: If you manage booking details in a separate sheet or document,
IMPORTRANGEcan pull that data into your itinerary, keeping everything consolidated.
Finding and Customizing Free Templates
You can find free travel itinerary templates by searching directly in Google Sheets' template gallery or via a web search for "Google Sheets travel itinerary template free." When you find one, don't just start filling it in. Take a moment to assess if it meets your needs.
Evaluating Template Structure
A good template will have clearly labeled columns and sections. Look for a logical flow, typically starting with overarching trip details, then moving to transportation and accommodation, and finally, the day-by-day breakdown. Pay attention to how dates and times are handled. Are they in a format that's easy to sort and filter? Does it include fields for essential booking references? If a template is missing key elements, don't discard it immediately. Often, adding a few columns or sheets is straightforward.
Consider a scenario where a template doesn't have a dedicated "Booking Reference" column. You can easily add one. Right-click on a column header (e.g., the header for "Notes") and select "Insert 1 column left" or "Insert 1 column right." Rename the new column header to "Booking Ref." This small addition can save significant time later.
Common Customization Steps
- 01Add/Remove Columns: If a template has a "Notes" column but you need more specific fields like "Confirmation Number" or "Contact Person," insert new columns. Conversely, if it has fields you don't need (e.g., "Baggage Allowance" for a train trip), you can delete those columns or hide them by right-clicking the column header and selecting "Hide column."
- 02Adjust Date/Time Formats: Ensure the date and time formats are consistent and suitable for your region. Select the relevant cells or columns, then go to Format > Number > Date time or Format > Number > Custom date and time to adjust.
- 03Color-Coding: Use background colors to differentiate types of entries (e.g., blue for travel, green for accommodation, yellow for activities) or to highlight important information.
- 04Formulas: Integrate simple formulas. For instance, if you have columns for "Departure Time" and "Arrival Time" on the same day, you could add a "Duration" column with a formula like
=IF(ISBLANK(A2), "", B2-A2)(assuming Departure Time is in A2 and Arrival Time is in B2). Format the Duration column as Duration (Format > Number > Duration). - 05Data Validation Lists: For columns like "Status" (e.g., "Booked," "Confirmed," "Pending"), set up data validation. Select the cells, go to Data > Data validation, choose "List of items," and enter your options separated by commas (e.g.,
Booked,Confirmed,Pending,Cancelled).
Advanced Techniques for Itinerary Management
Once you're comfortable with the basics, Google Sheets offers advanced features to make your itinerary even more powerful.
Using TRANSPOSE for Day-by-Day Views
As mentioned, TRANSPOSE is excellent for reformatting. Imagine you've entered your daily activities with the date in one column and the activity in another. If you prefer to see your itinerary laid out horizontally across days, TRANSPOSE can achieve this.
Let's say your raw data is in columns A and B, starting from row 2:
- Column A: Dates (e.g.,
2024-07-15,2024-07-15,2024-07-16) - Column B: Activities (e.g., "Morning flight to Rome," "Check into hotel," "Evening walk")
To transpose this into a format where each date is a column header:
- 01First, you need a unique list of dates. In a new area (e.g., column D), use the formula
=UNIQUE(A2:A)to get a list of all unique dates from your data. - 02In row 1 of another area (e.g., starting in E1), enter the formula
=TRANSPOSE(D2:D)(assuming your unique dates start in D2). This will create your date headers across the row. - 03Now, for the activities. In cell E2 (under the first date header), you'll need a formula that pulls the activity associated with that date. This often requires a combination of functions. A common approach uses
FILTER. If your activities are in column B and dates in A:
=IFERROR(TEXTJOIN(", ", TRUE, FILTER($B$2:$B, $A$2:$A=E$1)), "")
FILTER($B$2:$B, $A$2:$A=E$1): This part filters your activities (column B) to only include those where the date in column A matches the date header in cell E1.TEXTJOIN(", ", TRUE, ...): This joins multiple activities for the same day into a single cell, separated by a comma and a space. TheTRUEargument tells it to ignore empty cells.IFERROR(..., ""): This handles cases where there are no activities for a particular date, displaying a blank cell instead of an error.
- 04Drag this formula across to the right to cover all your date columns.
This method transforms a list-based itinerary into a more visual, calendar-like view.
Automating Reminders with Scripts
For proactive travel management, you can use Google Apps Script to send email reminders for upcoming flights or hotel check-ins. This involves writing a small script that runs on a schedule.
- 01Go to Extensions > Apps Script.
- 02Write a script to read your itinerary sheet, identify events within a certain timeframe (e.g., next 24 hours), and send an email using
MailApp.sendEmail(). - 03Set up a time-driven trigger (Triggers icon in the Apps Script editor) to run the script daily.
For example, a script might look for rows where the "Departure Time" is between NOW() and NOW() + 1 (for the next hour), or between TODAY() and TODAY() + 1 (for the next day), and then email you the details.
Common Mistakes to Avoid
Even with a template, people often make errors that diminish its usefulness.
- Inconsistent Data Entry: Not using the same format for dates, times, or place names makes sorting and searching difficult. For example, entering "Rome, Italy" in one cell and "Roma, IT" in another.
- Forgetting Booking References: This is a critical piece of information. Leaving the "Booking Ref" or "Confirmation Number" field blank for flights, hotels, or tours means you'll be scrambling to find it later.
- Over-reliance on Memory: Assuming you'll remember details like meeting points or specific instructions. Always document them.
- Not Sharing the Itinerary: For group travel, failing to share the Google Sheet means not everyone is on the same page, leading to confusion and missed connections. Ensure sharing permissions are set correctly.
- Not Backing Up or Syncing: While Google Sheets syncs automatically, ensure you have a reliable internet connection, especially when accessing critical information offline. Consider downloading a copy periodically or using offline access features if available.
- Ignoring Time Zones: For international travel, failing to specify or account for local time zones in your schedule can lead to missed appointments or activities. Clearly label times with their respective time zones or use Google Sheets' built-in time zone settings.
Not Specifying Time Zones
A frequent oversight, especially for international travel, is not clearly indicating time zones. If you have a flight departing Rome at 10:00 AM and arriving in New York at 1:00 PM, those times are in different zones. A simple way to handle this is to add a "Time Zone" column next to your "Departure Time" and "Arrival Time" columns, or to explicitly write the time zone in the cell (e.g., "10:00 AM CET," "1:00 PM EST"). Google Sheets also allows you to set a default spreadsheet time zone under File > Spreadsheet settings, but explicit labeling within the itinerary itself often provides the clearest reference.
Neglecting Offline Access
While Google Sheets is cloud-based, relying solely on online access can be problematic in areas with poor or no Wi-Fi/cellular service. Before your trip, ensure you have a strategy for offline access. You can download specific sheets or the entire spreadsheet as a PDF or Excel file. Google Sheets also offers an offline mode that needs to be enabled before you lose connectivity, allowing you to view and edit files. Make sure this is set up and tested.
Frequently Asked Questions
How do I make my itinerary accessible offline?
To access your Google Sheets itinerary offline, you first need to enable offline access in your Google Drive settings. Go to Google Drive on your computer, click the gear icon, select "Settings," and toggle on "Offline." Then, find your itinerary spreadsheet, right-click it, and select "Available offline." You can also download a copy as a PDF or Excel file from within Google Sheets by going to File > Download.
Can I track expenses within my itinerary?
Yes, absolutely. You can add columns for "Estimated Cost" and "Actual Cost" for each item or activity. You could even create a separate sheet for detailed expense tracking and use formulas like SUMIFS to aggregate costs by category (e.g., SUMIFS(ActualCostRange, CategoryRange, "Dining")) and link these totals back to your main itinerary sheet.
How can I easily share my itinerary with travel companions?
Click the green "Share" button in the top right corner of your Google Sheet. You can enter the email addresses of your companions or generate a shareable link. Decide whether they should have "Viewer," "Commenter," or "Editor" access. For a collaborative itinerary, "Editor" access is usually best.
What's the best way to handle multiple bookings for the same day?
If you have several activities or bookings on the same day, you have a few options. You can list them chronologically in separate rows for that date, ensuring each row has a distinct time. Alternatively, if space is tight or you prefer a consolidated view, you can use a single cell for that day's entry and list multiple events within that cell, separated by line breaks (Alt+Enter or Option+Enter within a cell) or using the TEXTJOIN function as demonstrated with the TRANSPOSE example.