Accurate material takeoff from your Excel template
A well-structured material takeoff spreadsheet template Excel offers clarity and control, preventing costly errors in your construction projects.
Manually calculating material takeoffs on scratch paper or in a disorganized folder quickly devolves into errors, while a well-structured material takeoff spreadsheet template Excel provides clarity and control. This isn't about choosing between a digital tool and a physical one; it's about choosing between a tool that actively helps you avoid costly mistakes and one that actively invites them. For construction projects, accurate material takeoffs are non-negotiable, directly impacting budget, scheduling, and profitability.
Getting your material takeoff spreadsheet template Excel right from the start saves hours of rework and prevents overspending. You need a system that can track quantities, units of measure, supplier pricing, and even waste factors. When you're dealing with lumber, concrete, drywall, and a dozen other materials, a central, organized system is critical. A good template will allow you to easily update quantities as project plans change and to quickly generate reports for procurement.
The Core Components of a Material Takeoff Sheet
A robust material takeoff spreadsheet template Excel typically includes several key columns to capture all necessary information. Think of these as the building blocks of your takeoff.
- Item Description: A clear, concise name for the material (e.g., "2x4x8 Stud," "1/2" Drywall Sheet," "1 Cubic Yard Concrete"). Be specific.
- Unit of Measure: How the material is sold and measured (e.g., "LF" for linear feet, "EA" for each, "SY" for square yards, "CY" for cubic yards, "SF" for square feet). Consistency here is vital.
- Quantity Needed: The calculated amount of the material required for the project, based on your plans and measurements.
- Waste Factor (%): An estimated percentage to account for cuts, damage, or unforeseen issues. This is often a crucial, overlooked detail.
- Total Quantity (with Waste): The "Quantity Needed" plus the "Waste Factor." This is the number you'll use for ordering. The formula would look something like
=C2*(1+D2)if Quantity Needed is in C2 and Waste Factor is in D2. - Unit Cost: The price per unit of measure from your supplier.
- Total Cost: The "Total Quantity (with Waste)" multiplied by the "Unit Cost." This is where the financial impact becomes clear. The formula would be
=E2*F2if Total Quantity is in E2 and Unit Cost is in F2. - Supplier: The name of the company where you plan to purchase the material.
- Notes: Any relevant information, such as specific product codes, brand preferences, or delivery details.
Setting Up Your Spreadsheet: A Step-by-Step Walkthrough
Let's walk through creating a basic, yet effective, material takeoff spreadsheet template Excel from scratch. We'll use hypothetical project data for a small interior renovation.
- 01Create Your Columns: Open a new Excel or Google Sheet. In the first row (Row 1), enter the column headers as listed above: "Item Description," "Unit of Measure," "Quantity Needed," "Waste Factor (%)," "Total Quantity (with Waste)," "Unit Cost," "Total Cost," "Supplier," and "Notes."
- 02Format for Clarity:
- Select columns F and G ("Unit Cost" and "Total Cost") and format them as Currency (e.g., "$").
- Select column D ("Waste Factor (%)") and format it as Percentage.
- Adjust column widths so all text is easily readable. You can do this by double-clicking the right edge of a column header.
- 03Input Initial Data: Start populating your sheet. For example, for the interior walls:
- Row 2: "2x4x8 Stud," "EA," 150, 10%,,,, "Local Lumber Yard," "For interior partition walls"
- Row 3: "1/2\" Drywall Sheet (4x8)," "EA," 75, 15%,,,, "Drywall Supply Co.," "Standard interior walls"
- Row 4: "1 Gallon Interior Paint (White)," "GL," 5, 5%,,,, "Paint Store," "Ceiling and trim paint"
- Row 5: "10x10 Vinyl Plank Flooring," "SY," 120, 8%,,,, "Flooring Warehouse," "Main living area"
- 04Enter Formulas:
- In cell E2 (Total Quantity for Studs), enter the formula:
=C2*(1+D2). Drag the fill handle (the small square at the bottom right of the cell) down to apply this formula to rows 3, 4, and 5. This automatically calculates the total quantity needed, including waste. - In cell G2 (Total Cost for Studs), enter the formula:
=E2*F2. Again, drag the fill handle down to apply this to the relevant rows.
- 05Add Pricing: Now, fill in the "Unit Cost" (Column F) for each item.
- Row 2: "2x4x8 Stud," "EA," 150, 10%, 165, $4.50,,, "Local Lumber Yard," "For interior partition walls"
- Row 3: "1/2\" Drywall Sheet (4x8)," "EA," 75, 15%, 86.25, $12.00,,, "Drywall Supply Co.," "Standard interior walls"
- Row 4: "1 Gallon Interior Paint (White)," "GL," 5, 5%, 5.25, $35.00,,, "Paint Store," "Ceiling and trim paint"
- Row 5: "10x10 Vinyl Plank Flooring," "SY," 120, 8%, 129.6, $8.75,,, "Flooring Warehouse," "Main living area"
- 06See the Total Costs Populate: With the unit costs entered, Column G will automatically calculate the total cost for each material line item.
- 07Grand Totals: At the bottom of your "Total Cost" column (e.g., in cell G7 if you have 5 rows of data and Row 6 is a blank separator), enter the formula
=SUM(G2:G6)to get your total project material cost.
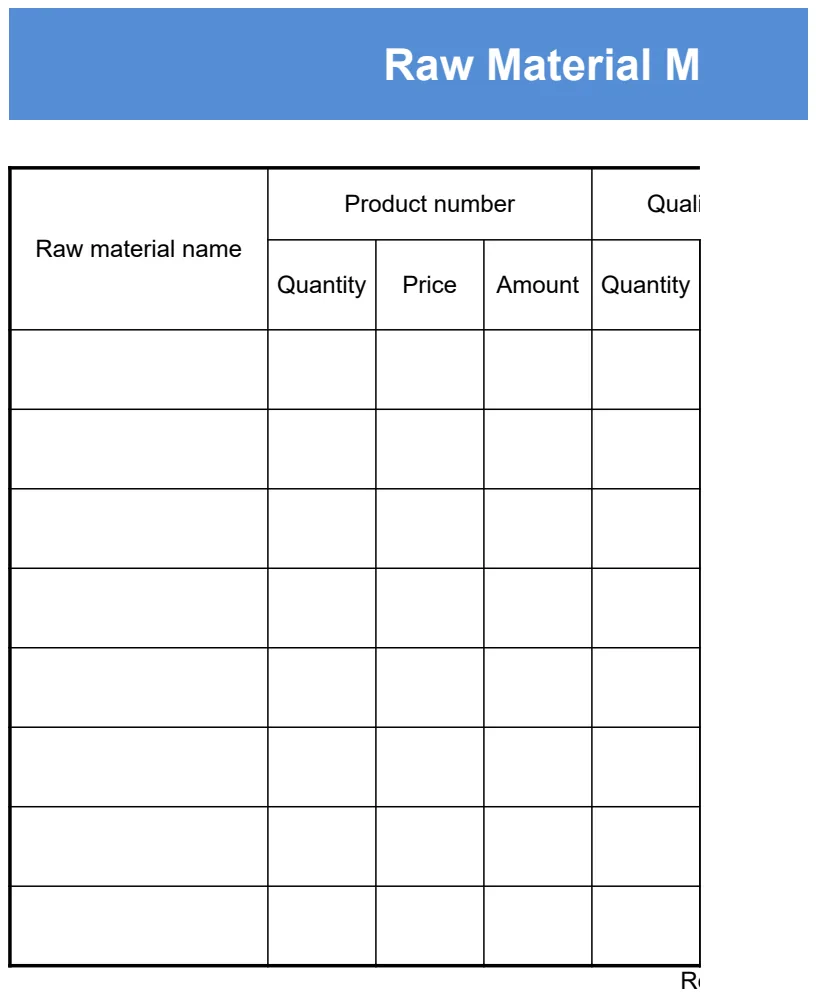
This process creates a dynamic and accurate material takeoff. As you get more comfortable, you can add columns for order dates, received quantities, or even link to supplier price lists. For more complex inventory tracking, a template like the Raw Material Management Form might be a good complement.
Expanding Your Material Takeoff Template
A basic takeoff is a great start, but you can enhance your material takeoff spreadsheet template Excel significantly.
- Categorization: Add a "Category" column (e.g., "Framing," "Drywall," "Flooring," "Paint"). This allows you to group materials and see costs by trade or area of the project.
- Subtotals: Use Excel's
SUMIFfunction to create subtotals for each category. For instance, if your categories are in Column H, you could have a separate summary section with a formula like=SUMIF(H:H, "Framing", G:G)to sum all framing material costs. - Conditional Formatting: Highlight items where the "Total Cost" exceeds a certain threshold, or flag items that are critically low in stock if you're also using this for inventory.
- Unit Conversion: For some materials, you might need to convert units (e.g., calculating cubic yards of gravel from a given length, width, and depth in feet). A dedicated tool like the Material Quantity Calculator for Construction can help you pre-calculate these or embed simple conversion formulas.
- Labor Estimates: While not strictly material takeoff, you could add columns for estimated labor hours per unit or cost per unit, and then sum those to get a preliminary labor budget.
Common Pitfalls to Avoid
Many errors in material takeoffs stem from simple oversights or a lack of a standardized process.
- Inconsistent Units of Measure: Mixing "LF" (linear feet) with "SF" (square feet) for the same material will lead to incorrect quantities and costs. Define your units early and stick to them.
- Forgetting Waste: Underestimating or ignoring waste is a surefire way to run out of materials and incur rush-order fees. Always factor in a realistic waste percentage.
- Typos in Formulas or Data Entry: A single misplaced decimal point or a mistyped number can have a significant ripple effect. Double-check your formulas and manually entered data, especially unit costs.
- Not Verifying Pricing: Relying on old price lists or making assumptions about material costs can lead to budget blowouts. Always get current quotes from your suppliers.
- Lack of Detail in Descriptions: Vague item descriptions like "Wood" or "Paint" make it hard to track exactly what was ordered and can lead to ordering the wrong product. Be specific.
Beyond the Takeoff: Inventory and Procurement
Once your material takeoff is complete, you'll transition to procurement and inventory management. A well-organized takeoff feeds directly into these processes. If you're tracking materials across multiple projects or managing stock levels, a Warehouse Material Stock List can be invaluable for seeing what you have on hand and what needs to be reordered. Similarly, if you're building components or assemblies, a Bills of Material Template helps break down the raw materials needed for each finished item.
What if material prices fluctuate wildly?
If your material costs are highly volatile, it's wise to build a buffer into your budget beyond the standard waste factor. You might add a "Contingency" line item at the end of your takeoff that represents a percentage of the total material cost, specifically for price increases. Alternatively, for key materials, you could create separate tabs or sections in your spreadsheet to track current pricing from multiple suppliers, allowing you to quickly choose the most cost-effective option at the time of purchase.
How do I handle quantities that aren't standard units?
For items like bulk materials (e.g., gravel, sand, mulch), you'll often need to convert measurements. If your plans give you dimensions in feet (length, width, depth), you'll need to calculate cubic feet first, then convert to cubic yards (since 1 cubic yard = 27 cubic feet). If you're ordering by the ton, you'll need the material's density to convert volume to weight. Many construction professionals keep a small reference sheet or a dedicated calculator for these common conversions to ensure accuracy in their material takeoff spreadsheet template Excel.
Can I use this for ordering materials directly?
Yes, your material takeoff spreadsheet can serve as the basis for purchase orders. You can add columns for "Date Ordered," "PO Number," and "Ordered Quantity." Once you've confirmed pricing and placed an order, you can update these fields. Some users even create a separate "Order Sheet" tab that pulls data from the takeoff, allowing them to consolidate orders to specific suppliers or track outstanding orders without cluttering the main takeoff. This makes the transition from planning to purchasing much smoother.
What's the best way to track actual material usage versus estimated usage?
To track actual usage, you'll want to create a parallel set of columns or a separate tab for "Actuals." As materials are used on site, have the site supervisor or foreman record the quantities. You can then compare these "Actuals" against your "Total Quantity (with Waste)" from the takeoff. This comparison is incredibly powerful for refining your waste factor calculations for future projects and identifying any discrepancies or potential theft. It turns your takeoff from a planning tool into a performance analysis tool.